This simple snowflake project details how to load data from Azure Blob Storage to the Snowflake data warehouse. You do not need any prior experience or download any tool to complete this tutorial.
The Snowflake data warehouse is a leading cloud data warehouse and it continues to gain popularity in the ever-growing data industry. I recommend every data engineer and analyst – beginner or expert who is yet to learn about this platform to do so fast.
If you’re already familiar with other popular relational databases like SQL Server, MySQL, or Oracle, you will find it easier to understand the Snowflake data warehouse (especially the ANSI SQL queries).
In this tutorial, I will show you how to:
- Create your Azure Blob Storage account
- Create your Snowflake account
- Create Snowflake database objects such as tables, file formats, stages
- Load data from the Azure Blob Storage account
- Connect to Snowflake from Power BI
- Create a dashboard with Power BI
Let’s get started.
1. Setup your Azure Blob Storage account
Here’s a video tutorial to help you complete this step.
Here’s an overview:
- Visit the Azure website to create a free account (if you don’t already have one).
- Create a resource group
- Create a storage account
- Create a container
- Upload your file
If done correctly, you should have something like this.
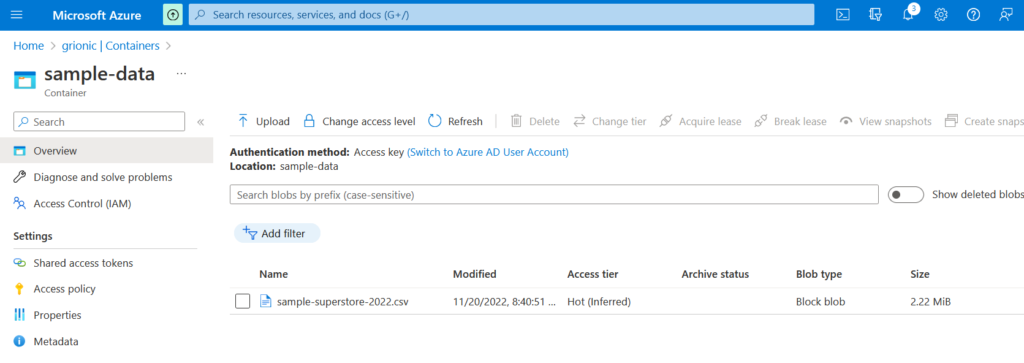
Here are the Azure services/objects I created and their names:
| Azure Service or Object | Name |
| Resource group | Training |
| Storage account | abcdef |
| Container | sample-data |
| File | sample-superstore-2022.csv |
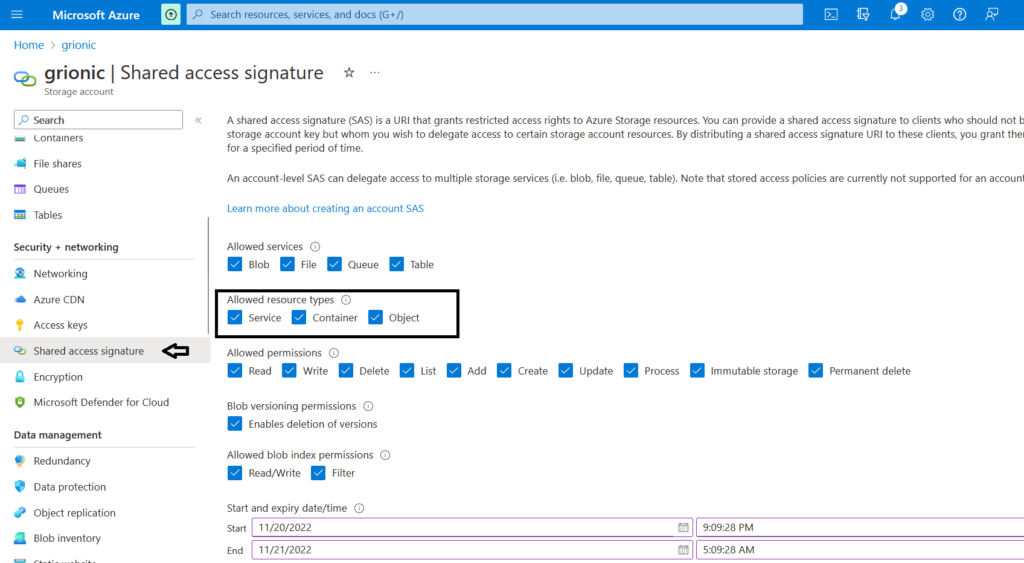
Make the resource types accessible via SAS
- Go to your Storage account page on Azure
- Under the Security + Networking section on the left side of the page, click Share access signature.
- Select the checkboxes Service, Container, and Object.
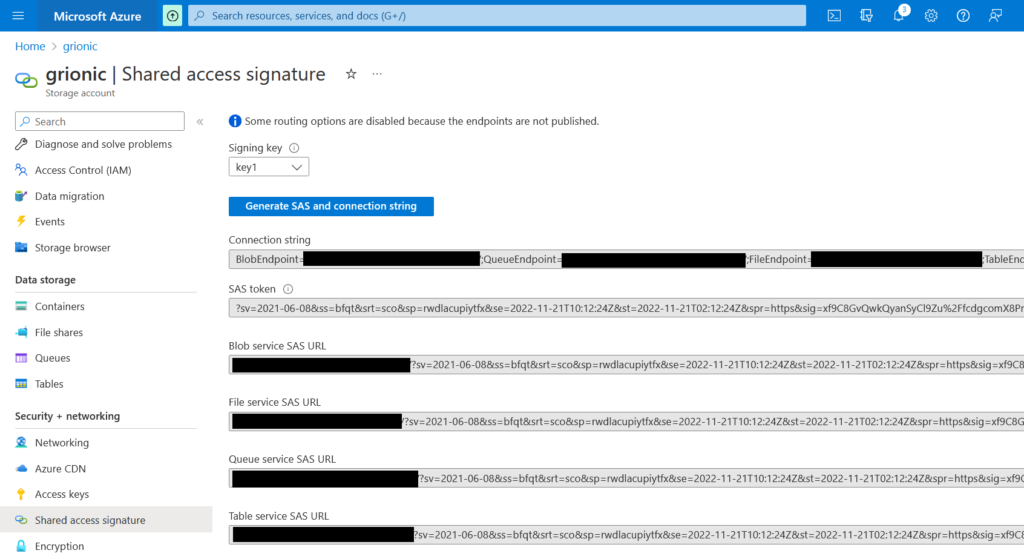
At the bottom of the page, click the button Generate SAS and connection string.
Great job! Your Azure account is ready.
2. Create your Snowflake account
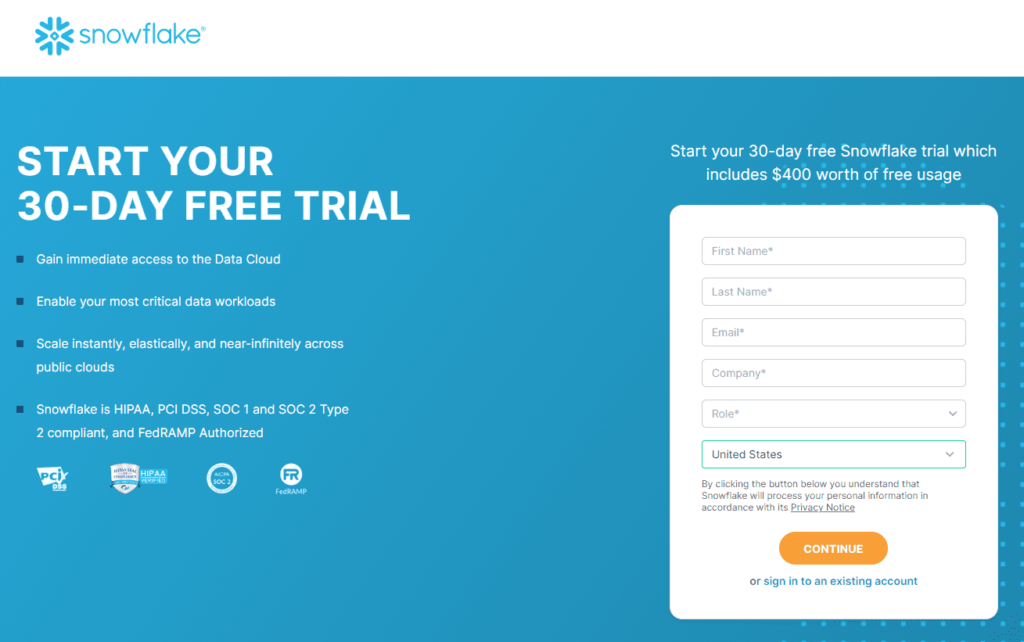
Visit the snowflake website. Click the START FOR FREE button.
Sign in or Sign up for a new account if you don’t have one already.
For the purpose of this tutorial, use the ACCOUNTADMIN role.
To do this, on the top-left corner of your page, click your name, then click current role, and then select the ACCOUNTADMIN role.
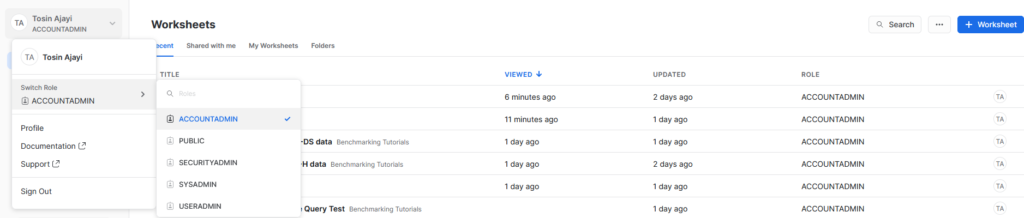
You can learn more about the Snowflake access control framework and roles here.
3. Create Snowflake database objects
On the top-right corner of the page, click the Worksheet button to create a new worksheet.
This worksheet will be used to create our snowflake objects.
1. Rename your worksheet
To do this by clicking the timestamp on the top-left of your page.

Select the Databases tab on the left pane. This will allow us to see the database we are about to create.
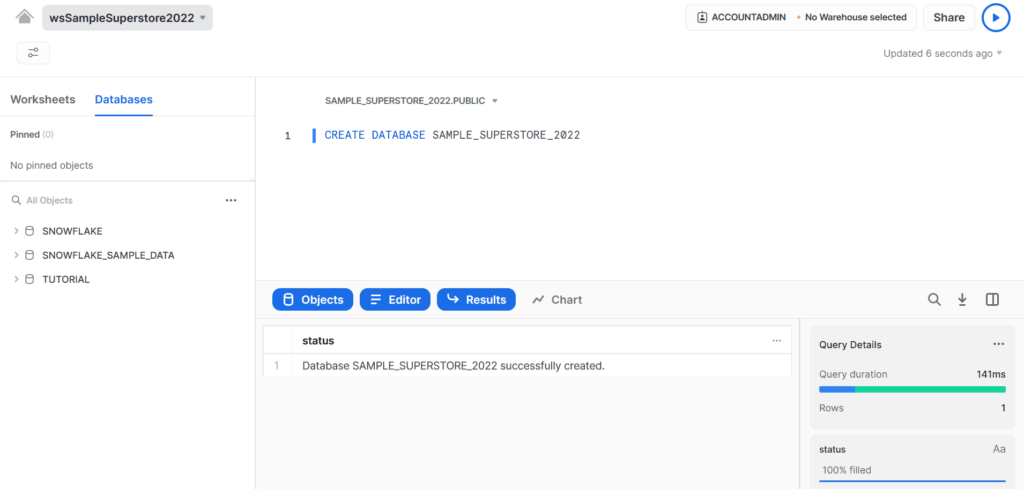
2. Create your database
CREATE DATABASE SAMPLE_SUPERSTORE_2022Type the query above into your worksheet and click the play button on the top-right corner of the page.
If your query ran successfully, you should get status feedback like the one shown below.
3. Create your schema
In the “spirit of SQL Server”, I will name my schema DBO.
CREATE SCHEMA DBO4. Create your warehouse
Now, create your warehouse. I’d call mine MYWH.
CREATE WAREHOUSE MYWH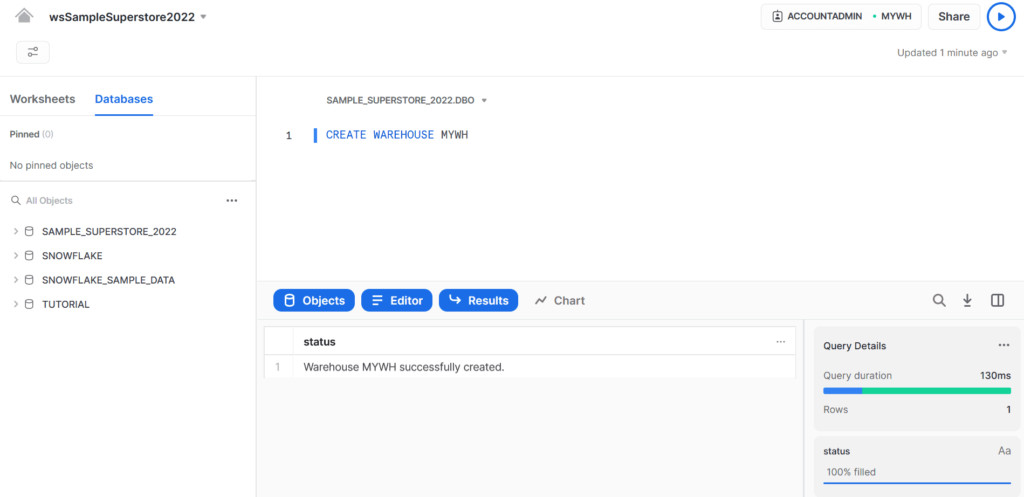
At this point, the editor pane has changed its scope to that of your newly created database, schema, and warehouse.
5. Create your table
Now, create your table. We would be importing our CSV data into this table shortly.
CREATE OR REPLACE TABLE ORDERS (
	ROW_ID INTEGER,
	ORDER_ID STRING,
	ORDER_DATE DATE,
	SHIP_DATE DATE,
	SHIP_MODE STRING,
	CUSTOMER_ID STRING,
	CUSTOMER_NAME STRING,
        SEGMENT STRING,
        COUNTRY_REGION STRING,
        CITY STRING,
        STATE_PROVINCE STRING,
        POSTAL_CODE STRING,
        REGION STRING,
        PRODUCT_ID STRING,
        CATEGORY STRING,
        SUB_CATEGORY STRING,
        PRODUCT_NAME STRING,
        SALES FLOAT,
        QUANTITY INTEGER,
        DISCOUNT FLOAT,
        PROFIT FLOAT
);
Since this is a tutorial, I’m using the max length for the data types. For instance, STRING is the same as VARCHAR(16777216) in snowflake and varchar(max) in SQL Server.
To be more precise, feel free to use VARCHAR(<length>) or NUMBER(<precision>, <scale>). To learn more about Snowflake data types, read the documentation here.
6. Create a CSV File Format object
This file format object contains important information about the data to be loaded from Azure.
CREATE FILE FORMAT AZURE_CSV
        TYPE=CSV
	SKIP_HEADER = 1
	EMPTY_FIELD_AS_NULL = true
        ENCODING = 'ISO-8859-1'
FIELD_OPTIONALLY_ENCLOSED_BY='"'- TYPE=CSV: This means the file to be loaded is in CSV format
- SKIP_HEADER = 1: Skip the first header
- EMPTY_FIELD_AS_NULL = true: Replace null with NULL
- ENCODING = ‘ISO-8859-1’: Encodes string like “Barry Französisch” contained in the data
- FIELD_OPTIONALLY_ENCLOSED_BY='”‘: Avoid issues with strings that have commas
Read more on creating file formats and other format type options.
7. Create a stage
A stage is a temporary location where your data is stored before being loaded into your table.
CREATE OR REPLACE STAGE STAGE_ORDERS
    url='azure://grionic.blob.core.windows.net/sample-data'
    credentials=(azure_sas_token='?sv=2021-06-08&ss=bfqt&srt=sco&sp=rwdlacupiytfx&se=2022-11-21T13:38:34Z&st=2022-11-19T05:38:34Z&spr=https&sig=rHstIKlzWVH1WSjkm9N06GP6Ph%2FdX21IAQTe%2FsKjAuw%3D')
    file_format = AZURE_CSV;
Test your stage to make sure it’s set up correctly.
list '@stage_orders/sample-superstore-2022.csv'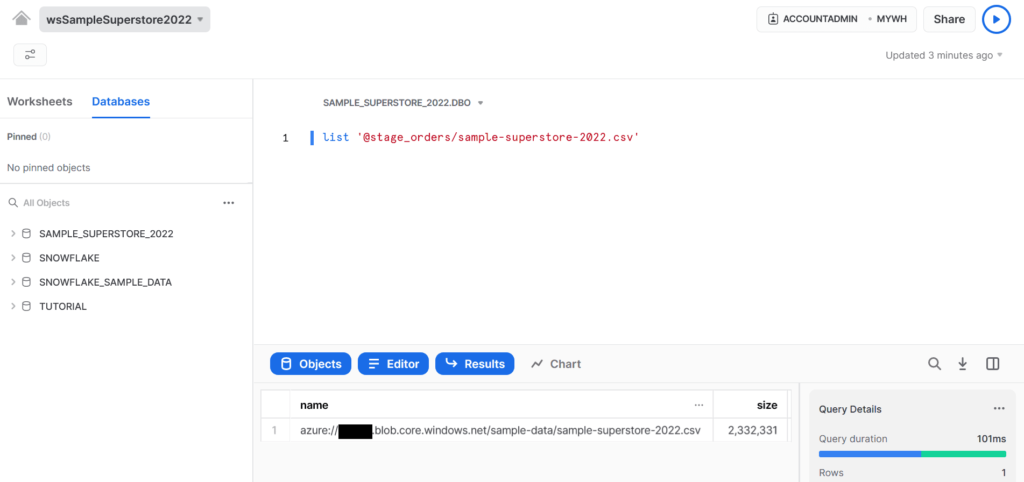
List the data.
SELECT
    s.$1 AS ROW_ID,
    s.$2 AS ORDER_ID,
    s.$3 AS ORDER_DATE,
    s.$4 AS SHIP_DATE,
    s.$5 AS SHIP_MODE,
    s.$6 AS CUSTOMER_ID,
    s.$7 AS CUSTOMER_NAME,
    s.$8 AS SEGMENT,
    s.$9 AS COUNTRY_REGION,
    s.$10 AS CITY,
    s.$11 AS STATE_PROVINCE,
    s.$12 AS POSTAL_CODE,
    s.$13 AS REGION,
    s.$14 AS PRODUCT_ID,
    s.$15 AS CATEGORY,
    s.$16 AS SUB_CATEGORY,
    s.$17 AS PRODUCT_NAME,
    s.$18 AS SALES,
    s.$19 AS QUANTITY,
    s.$20 AS DISCOUNT,
    s.$21 AS PROFIT
FROM '@stage_orders/sample-superstore-2022.csv' AS s
LIMIT 100;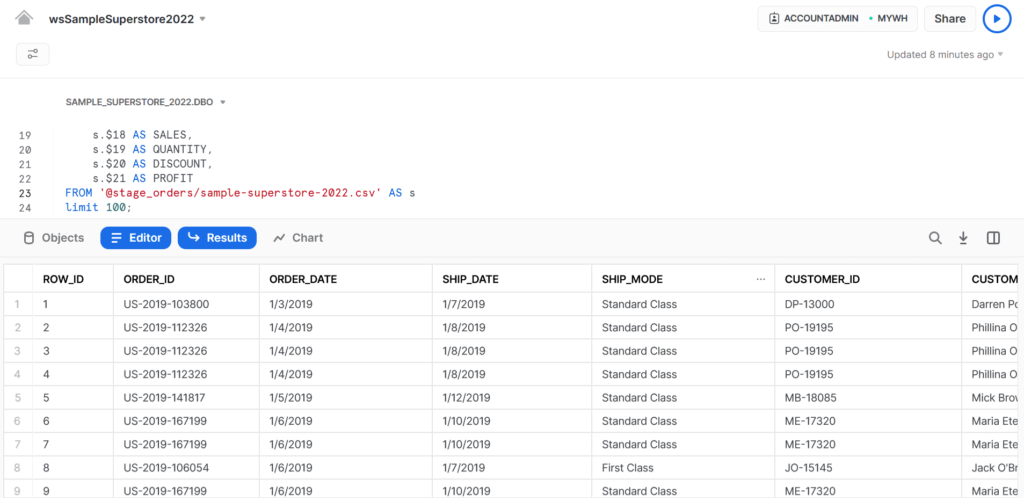
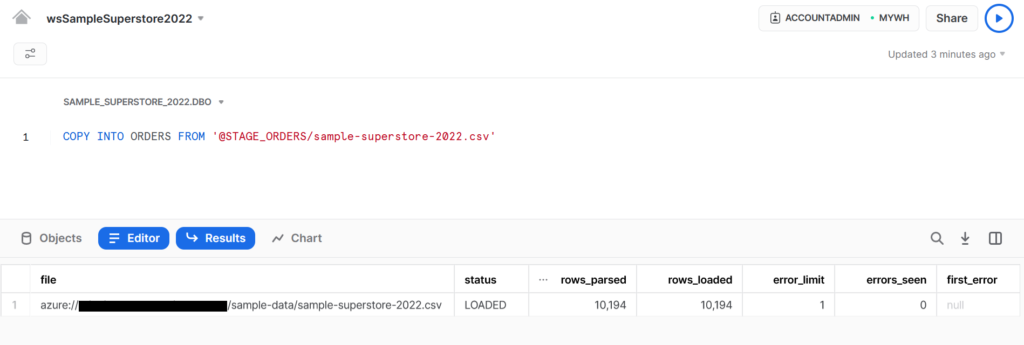
4. Load data from the Azure Blob Storage account into Snowflake
Now is the time for the real magic – loading your data from azure into Snowflake.
COPY INTO ORDERS FROM '@STAGE_ORDERS/sample-superstore-2022.csv'Your result should look like this.
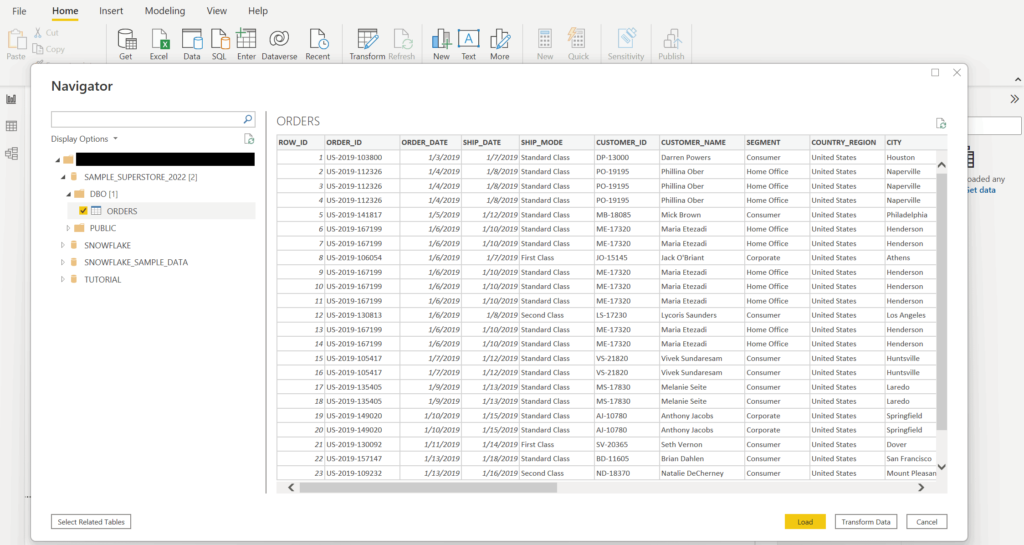
You can now use select statements to query your table.
SELECT * FROM ORDERS LIMIT 100Great job!
5. Connect to Snowflake from Power BI
Open your Power BI Desktop app.
Click Get Data and search for “Snowflake“. Click the Connect button
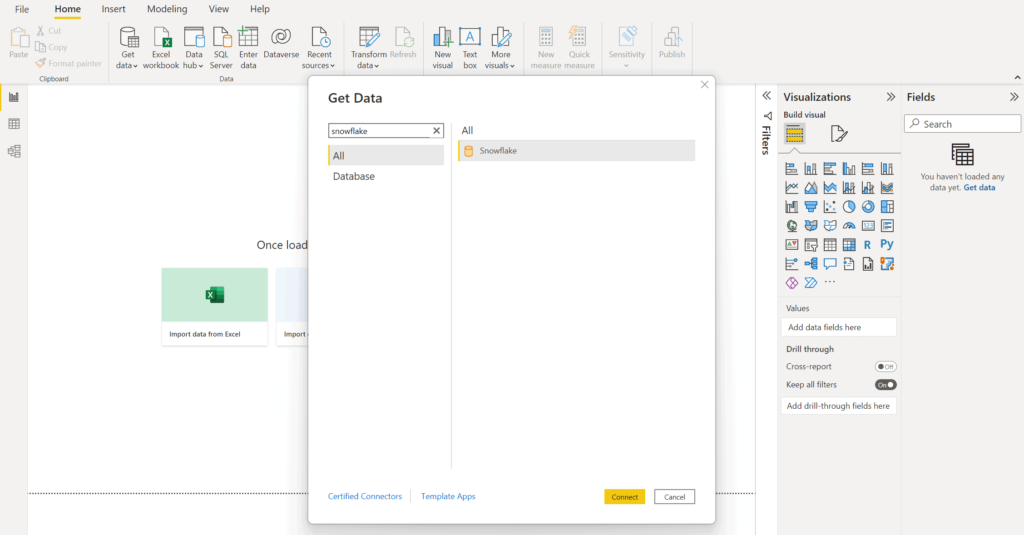
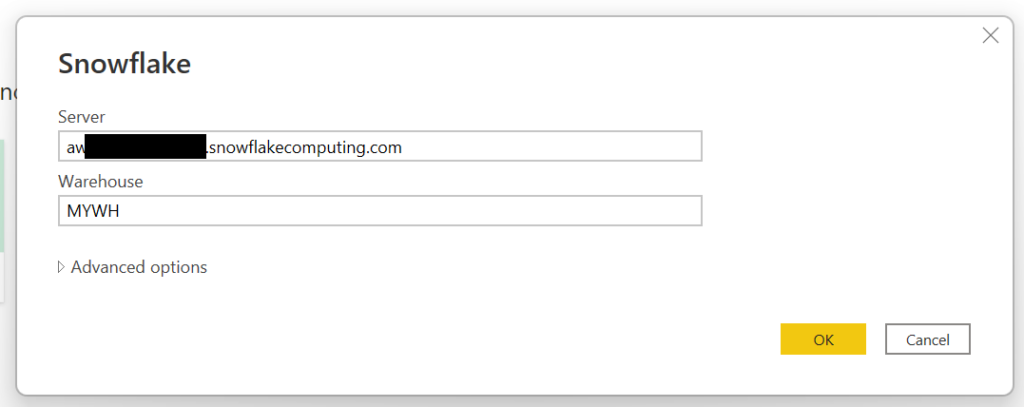
You will be prompted to input your server name and warehouse.
- Your Server name can be found in your activation email. This is the first email you received when you create your account. Do not add “https://” to the server name.
- Your Warehouse is the one you created earlier.
Add the required information and click OK.
You may be required to add your Snowflake account username and password for additional verification.
If you were able to get to this point, good job! Congratulations on completing this Snowflake project.
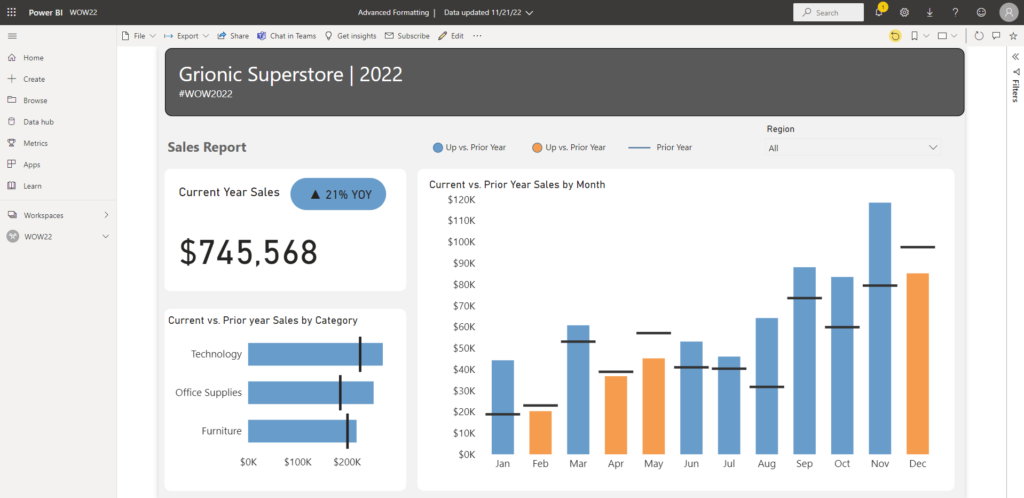
6. Create a dashboard with Power BI
Finally, you can create a simple dashboard with Power BI Desktop to complete this project.
I will be going above and beyond to create a dashboard to brush up on my Power BI formatting skills. this is the #WOW2022 Week 43 Power BI challenge.
Here’s a snapshot of my dashboard.
Bonus
Let’s write and run some simple SQL queries to draw some insights.
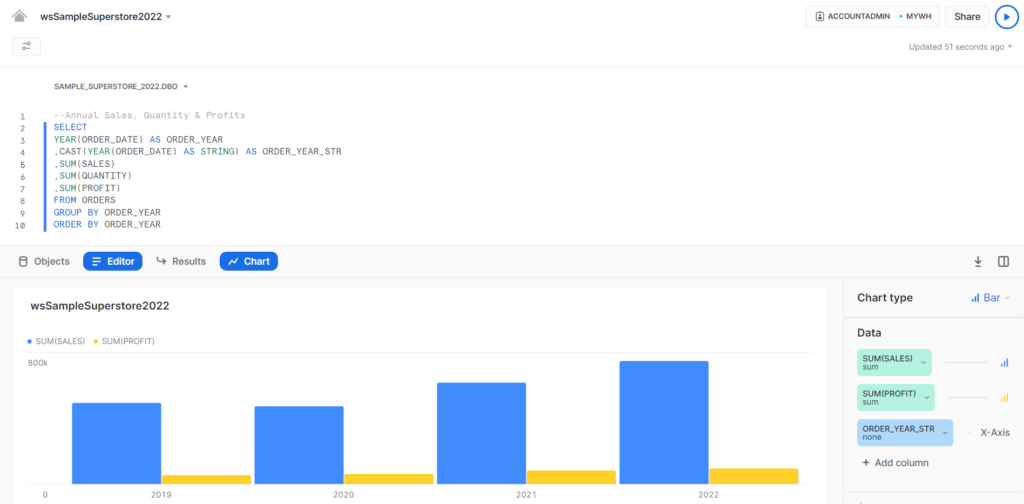
Query 1. Annual Sales, Quantity & Profits
What are the total sales, quantity and profits by year? Create a basic bar chart to highlight this KPI.
SELECT
      YEAR(ORDER_DATE) AS ORDER_YEAR
      ,CAST(YEAR(ORDER_DATE) AS STRING) AS ORDER_YEAR_STR
      ,SUM(SALES)
      ,SUM(QUANTITY)
      ,SUM(PROFIT)
FROM ORDERS
GROUP BY ORDER_YEAR
ORDER BY ORDER_YEAR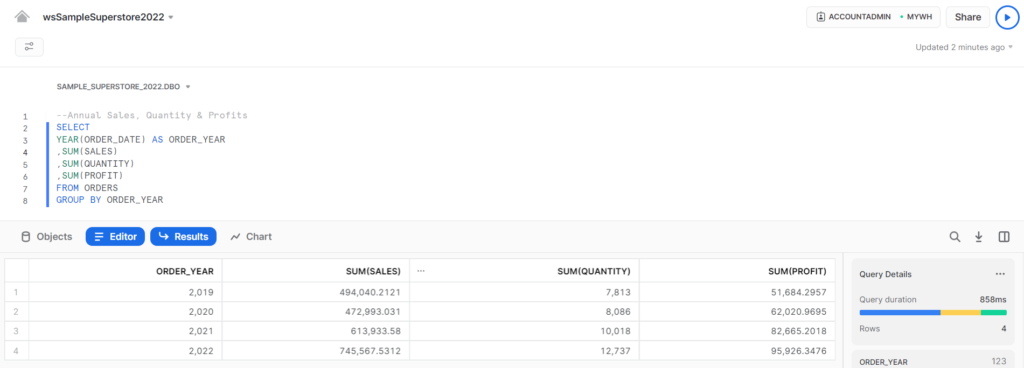
You can also play around with the charts available on Snowflake.
Query 2. Date with most sale
What date did the Superstore company make the most sales?
SELECT
ORDER_DATE
FROM ORDERS
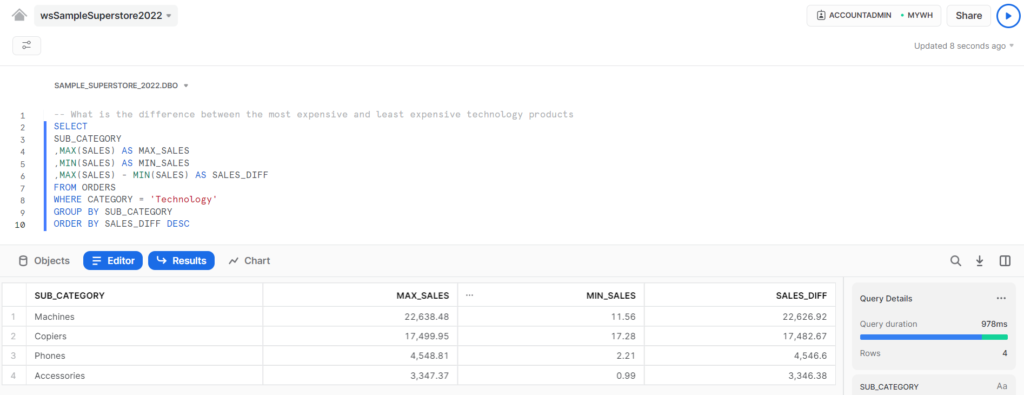
WHERE SALES = (SELECT MAX(SALES) FROM ORDERS)Query 3: Most expensive and least expensive technology products
What is the most expensive, the least expensive product, and the difference between the most expensive and least expensive technology products?
--
SELECT
      SUB_CATEGORY
      ,MAX(SALES) AS MAX_SALES
      ,MIN(SALES) AS MIN_SALES
      ,MAX(SALES) - MIN(SALES) AS SALES_DIFF
FROM ORDERS
WHERE CATEGORY = 'Technology'
GROUP BY SUB_CATEGORY
ORDER BY SALES_DIFF DESC
Your result should look like this.
Conclusion
I hope you enjoyed this tutorial on how to load Data From Azure Blob Storage Into Snowflake.
In this tutorial, you learned:
- how to create an Azure account and upload the Sample Superstore CSV dataset
- set up a snowflake data warehouse and load data from Azure
- and connect to the snowflake data warehouse to create your dashboard.
I hope this tutorial was helpful.
Happy Analyzing!